Updated July 22 2024 now over 1,700 lines.Most of these are TERMINAL COMMANDS and must be run in a Terminal window.
There are over 1,700 lines of commands. I would install these two things first "Terminator Terminal and Notepad qq"
Then copy and paste this whole list in Notepad qq and use the search to "Find" the command/s you're looking for.
Like Hard Disk, SSD, Monitor, Clock, Games, TeamSpeak, Nvidia, AMD, VLC, Software Center, i386, VirtualBox, Computer Name, Password, Themes...
The list is to long to name everything just search for it it is probably there!
Most of these commands will work in Ubuntu, Xubuntu 18.04, 20.04, 22.04, Mint 19.03+.
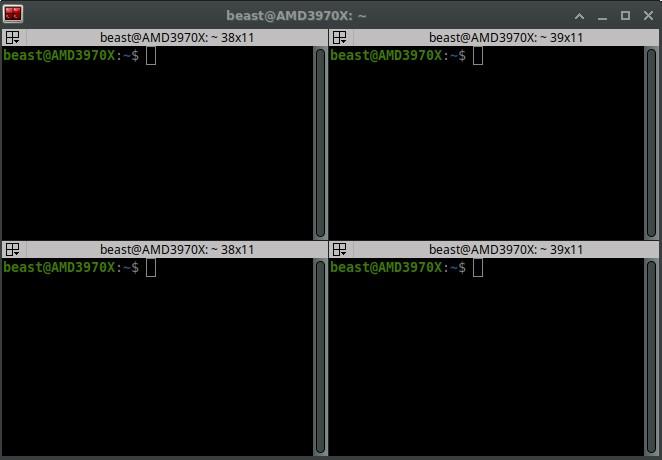
Install Terminator Terminal - Terminator can run multiple terminal windows in one window by right clicking and splitting the termianl window.
Type or copy and paste this hit enter: sudo apt-get update
Type or copy and paste this hit enter: sudo apt-get install terminator
Type or copy and paste this hit enter: sudo apt-get update
You can find it on your menu under Accessories if you're still using the picture mode lol no menus just search for it.
Viewed and used in Notepad QQ Notepad QQ is just like Notepad++ in Windows.
The version in the new Software Center may still be buggy? Then just install it old school.
Install Notepad qq = notepad++
Type or copy and paste this hit enter: sudo add-apt-repository ppa:notepadqq-team/notepadqq
Type or copy and paste this hit enter: sudo apt-get update
Type or copy and paste this hit enter: sudo apt install snapd
Type or copy and paste this hit enter: sudo apt-get install notepadqq (only works in older distro's)
Type or copy and paste this hit enter: sudo snap install --classic notepadqq (xubuntu, ubunut 18.04, 20.04 Mint 19.3...)
You can find it on your menu under Accessories if you're still using the picture mode lol no menus just search for it.
Install Terminator Terminal - Terminator can run multiple terminal windows in one by right clicking and splitting the terminal window.
Linux OS code names Ubuntu - Xubuntu LTS versions: Xfce
Ubuntu - Xubuntu 22.04 LTS "jammy"
Ubuntu - Xubuntu 20.04 LTS "Focal Fossa"
Ubuntu - Xubuntu 18.04 LTS “Bionic Beaver”
Ubuntu - Xubuntu 16.04 LTS “Xenial Xerus”
Ubuntu - Xubuntu 14.04 LTS “Trusty Tahr”
To check Linux OS version:
Type or copy and paste this hit enter: lsb_release -a
You can find it on your menu under Accessories if you're still using the picture mode lol no menus just search for it.
Two things you should run daily in a Terminal Window.
Type or copy and paste this hit enter: sudo apt-get update (or sudo apt update)
Type or copy and paste this hit enter: sudo apt-get upgrade (or sudo apt upgrade)
Open text files without being asked "Display or Run" every time.
Install Nemo File Manager
Under Edit - Prefences - Behavior - "Executable Text Files"
Check - view executable text files when they are opened
install .deb .run files
Open your favorite Terminal Windows
Type or copy and paste this hit enter: cd Downloads
Type or copy and paste this hit enter: sudo apt install ./NAME-OF-THE-FILE.deb
Take owership/change read and write permissions:
Type or copy and paste this hit enter: sudo chown your-username:your-username /media/your-username/folder-name -R
Type or copy and paste this hit enter: sudo chown your-username:your-username /media/folder-name -R
Make videos play in the slimjet browser
Type or copy and paste this hit enter: sudo cp libffmpeg.so /opt/slimjet/
Fix NTFS drives: (after bad shutdowns fix problems without windows)
"sda6" would be the name of the partition or disk you're trying to fix.
You can find that information by opening "Disks" on your start menu or searching if you don't have a start menu.
Type or copy and paste this hit enter: sudo ntfsfix -b -d /dev/sda6
Type or copy and paste this hit enter: --help
You should see something like this.
ntfsfix v2015.3.14AR.1 (libntfs-3g)
Usage: ntfsfix [options] device
Attempt to fix an NTFS partition.
-b, --clear-bad-sectors Clear the bad sector list
-d, --clear-dirty Clear the volume dirty flag
-h, --help Display this help
-n, --no-action Do not write anything
-V, --version Display version information
Software Center upgrade if you hate "Snap" like 99% of the users ad "Flatpak" and get good software again.
Install Flatpak Xubuntu / Ubuntu 20.04 or newer, Mint 19.3 or newer:
Type or copy and paste this hit enter: sudo apt install flatpak
Type or copy and paste this hit enter: sudo apt install gnome-software-plugin-flatpak
Type or copy and paste this hit enter: flatpak remote-add --if-not-exists flathub https://flathub.org/repo/flathub.flatpakrepo
Install Flatpak Xubuntu / Ubuntu 18.04 and older, Mint 19 and older
Type or copy and paste this hit enter: sudo add-apt-repository ppa:flatpak/stable
Type or copy and paste this hit enter: sudo apt update
Type or copy and paste this hit enter: sudo apt install flatpak
Type or copy and paste this hit enter: sudo apt install gnome-software-plugin-flatpak
Type or copy and paste this hit enter: flatpak remote-add --if-not-exists flathub https://flathub.org/repo/flathub.flatpakrepo
Clear memory cache Ubuntu, Xubuntu 20.04, 22.04, Mint 19.03+:
Switch to root
Type or copy and paste this hit enter: sudo -i
Clear PageCache only.
Type or copy and paste this hit enter: sync; echo 1 > /proc/sys/vm/drop_caches
Clear dentries and inodes.
Type or copy and paste this hit enter: sync; echo 2 > /proc/sys/vm/drop_caches
Clear pagecache, dentries, and inodes.
Type or copy and paste this hit enter: sync; echo 3 > /proc/sys/vm/drop_caches
Boot problems:
If you can see the boot choices choose "anything (recovery mode)"
Then select the option you think will fix your problem.
Boot to terminal
Ctrl + Alt + F2
If you can not see the boot choices, reboot and start pressing these keys Ctrl + Alt + F2
Keep restarting and doing it until you see a terminal window. Once you see the terminal window
type in the code to fix the problem. "sudo fsck" "sudo e2fsck" to fix disk problems.
Install Skype Ubuntu, Xubuntu 20.04, 22.04, Mint 19.03+:
Type or copy and paste this hit enter: sudo snap install skype --classic
MS login
Email:
[email protected]Pass: your password
Pin: your pin
Install Viber Ubuntu, Xubuntu 20.04, 22.04, Mint 19.03+:
Type or copy and paste this hit enter: sudo snap install --edge viber-mtd
Type or copy and paste this hit enter: wget -O ~/viber.deb
https://download.cdn.viber.com/cdn/desktop/Linux/viber.debType or copy and paste this hit enter: sudo apt install gdebi-core
Type or copy and paste this hit enter: sudo gdebi ~/viber.deb
Install Telegram Ubuntu, Xubuntu 20.04, 22.04, Mint 19.03+:
Type or copy and paste this hit enter: sudo apt install telegram-desktop
Type or copy and paste this hit enter: sudo apt install telegram-cli telegram-purple
Start Telegram Ubuntu, Xubuntu 20.04, 22.04, Mint 19.03+:
Type or copy and paste this hit enter: telegram-desktop
Change your login password
Open Terminal
Type or copy and paste this hit enter: sudo su
Type in the new password and hit enter: passwd username (username - your username)
Change Computer Name.
Type or copy and paste this hit enter: sudo nano /etc/hostname
Type or copy and paste this hit enter: sudo nano /etc/hosts
Restart the computer if you like in Terminal sudo service hostname restart
Customize your clock in the panel.
Date format
ddd . MMMM ..d .yyyy ...h:mm:ss ..........tt
Day . Month Date Year hour minutes seconds AM/PM
How to become "Root" in Terminal. BE CAREFUL editing as ROOT can make a mess of things!
Type or copy and paste this hit enter: sudo -i
Add and use System Monitors:
Type or copy and paste this hit enter: sudo up2date install sysstat
Type or copy and paste this hit enter: sudo apt-get install nmon (it may not install on newer versions)
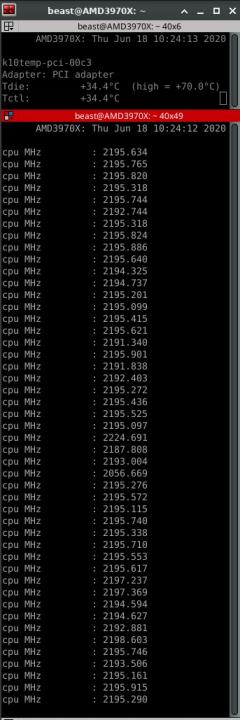
To see CPU temps:
Type or copy and paste this hit enter: watch -n 2 sensors
To see all CPU's current and changing clock speeds: (will not show all 64 CPU's on a threadripper 3970X just not enough room on the screen LOL)
Type or copy and paste this hit enter: watch -n10. "cat /proc/cpuinfo | grep \"^[c]pu MHz\""
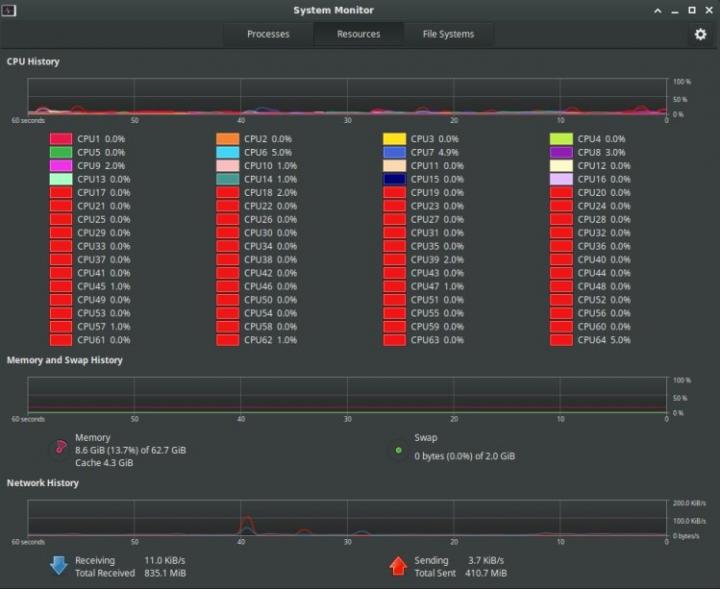
To see memory, network and all CPU usage:
Type or copy and paste this hit enter: gnome-system-monitor
Stop Xubuntu, Ubuntu, Mint from turning off your screen/s. "Blank screen when the computer goes idle"
You should be able to do this in "Power Management". But for some reason sometimes it just does not work!
To stop it during your current session:
Type or copy and paste this hit enter: sudo xset s off && xset -dpms
To check and make sure DPMS is Disabled:
Type or copy and paste this hit enter: xset -q
To set it permanently on a reboot edit the .profile file in the Home folder.
You will need to "Show Hidden Files" to see the ./profile file.
Just right click "Open with" and choose a text editor I used "Mousepad".
Add this to the bottom of the file: (at least one space below the last line in the file)
# Disable blank screen
xset s off && xset -dpms
If you want to disable it during a current session:
xset s on && xset -dpms
I you want to disable it permanently either delete the lines you added to the .profile or just add a # like this.
# Disable blank screen
# xset s off && xset -dpms
Then remove the # to turn in back on any time in the future.
Change - Add - Resize your Swapfile. Start with opening your favorite Terminal Window.
(If you have multiple drives I would disconnect all but the drive you want the swapfile on. By default it should be added to your Linux OS partition)
1. To check the size of your swapfile first.
Type or copy and paste this hit enter: grep SwapTotal /proc/meminfo
2. Turn off the swapfile process.
Type or copy and paste this hit enter: sudo swapoff -a
3. Resize or add a swapfile (Below would increase, add or change the size to 32GB)
Type or copy and paste this hit enter: sudo dd if=/dev/zero of=/swapfile bs=1G count=32
4. To attach the swapfile to partition. (If you have multiple drives I would disconnect all but the drive you want the swapfile on)
Type or copy and paste this hit enter: sudo mkswap /swapfile
5. Turn the swapfile back on or start using the new or changed one.
Type or copy and paste this hit enter: sudo swapon /swapfile
6. Check the size of the changed, new or added swapfile.
Type or copy and paste this hit enter: grep SwapTotal /proc/meminfo
7. Not required but I think it's always a good idea after major changes restart the system,
Ubuntu 20.04 ONLY
Install or update .deb
sudo dpkg -i DEB_PACKAGE
Remove
sudo dpkg -r PACKAGE_NAME
Change the horrid default login screen. Xfce
Xubuntu, Ubuntu 20.04 ONLY replace or fix the horrible pink login/lock screen.
Open a terminal window and run these,
First install libglib2.0-dev-bin
1. Type or copy and paste this hit enter: sudo apt install libglib2.0-dev-bin
2. Type or copy and paste this hit enter: sudo apt-get update
3. Type or copy and paste this hit enter: curl -L -O github.com/thiggy01/change-gdm-background/raw/master/change-gdm-background
4. Type or copy and paste this hit enter: chmod +x change-gdm-background
5. Set the wallpaper you would like to use:
Type or copy and paste this hit enter: sudo ./change-gdm-background /home/beast/Pictures/Desktops/xubuntu-backgrounds/planet-1.jpg
It should ask if you want to restart GDM Services. CLOSE EVERYTHING YOU HAVE OPEN BEFORE YOU TYPE IN "Y" (YES)
6. If it did not ask to restart GDM restart GDM services: (CLOSE AND SAVE ALL YOUR WORK FIRST)
Type or copy and paste this hit enter: systemctl restart gdm.service
7. Restart your system.
You can restore your original gdm theme any time with sudo ./ubuntu-20.04-change-gdm-background --restore
Software Center install of .deb files won't upgrade or install.
Type or copy and paste this hit enter: sudo dpkg -i FILE-NAME.deb
Fix dual boot time problem with Windows
Open a terminal window: (Set time to local no update)
Type or copy and paste this hit enter: timedatectl set-local-rtc 1 --adjust-system-clock
Now to check the settings.
Type or copy and paste this hit enter: timedatectl
You should see this:
Local time: Thu 2020-06-18 03:34:59 PDT
Universal time: Thu 2020-06-18 10:34:59 UTC
RTC time: Thu 2020-06-18 10:34:59
Time zone: America/Los_Angeles (PDT, -0700)
System clock synchronized: yes
NTP service: active
RTC in local TZ: yes
Warning: The system is configured to read the RTC time in the local time zone.
This mode cannot be fully supported. It will create various problems
with time zone changes and daylight saving time adjustments. The RTC
time is never updated, it relies on external facilities to maintain it.
If at all possible, use RTC in UTC by calling
'timedatectl set-local-rtc 0'.
To set the time back to automatic update:
Type or copy and paste this hit enter: timedatectl set-local-rtc 0
Now to check the settings.
Type or copy and paste this hit enter: timedatectl
You should see this:
Local time: Thu 2020-06-18 03:49:02 PDT
Universal time: Thu 2020-06-18 10:49:02 UTC
RTC time: Thu 2020-06-18 10:49:01
Time zone: America/Los_Angeles (PDT, -0700)
System clock synchronized: yes
NTP service: active
RTC in local TZ: no
Fix time in 64bit Windows instead of Linux.
Run regedit in the run box to open the registry editor and go to:
HKEY_LOCAL_MACHINE\SYSTEM\CurrentControlSet\Control\TimeZoneInformation
Right click and add a new QWORD 64 bit or DWORD 32 bit value.
Name your new value RealTimeIsUniversal
Double-click the "RealTimeIsUniversal" value you just created, set is value data to 1, and click “OK”.
That won't stop Windows from messing up the time but you are almost there.\
Now open a "COMMAND PROMPT" (Dos window) right click run as admin.
Type or copy and paste this hit enter: sc config w32time start= disabled
That should disable the windows time service from changing your bios time.
And changing back to local time on shut down or restart.
Install Nemo File Manager nemo -n
Type or copy and paste this hit enter: sudo apt install nemo
Set Nemo as your default desktop in Ubuntu 20.04+ (some do not need "sudo" but all will work using sudo")
To switch to Nemo in Ubuntu:
Set Nemo as your default desktop in Ubuntu 20.04+ (some do not need "sudo" but all will work using sudo")
Type or copy and paste this hit enter: sudo apt update
Type or copy and paste this hit enter: sudo apt install nemo
Type or copy and paste this hit enter: sudo xdg-mime default nemo.desktop inode/directory application/x-gnome-saved-search
Type or copy and paste this hit enter: sudo gsettings set org.gnome.desktop.background show-desktop-icons false
Type or copy and paste this hit enter: sudo gsettings set org.nemo.desktop show-desktop-icons true
Type or copy and paste this hit enter: sudo apt install dconf-editor gnome-tweak-tool
To switch to Nemo Xubuntu:
Xubuntu 20.04+ (some do not need "sudo" but all will work using sudo")
Type or copy and paste this hit enter: sudo apt update
Type or copy and paste this hit enter: sudo apt install nemo
Type or copy and paste this hit enter: sudo xdg-mime default nemo.desktop inode/directory
Type or copy and paste this hit enter: sudo apt install dconf-editor gnome-tweak-tool
Then in both Ubuntu and Xubuntu:
Check default Desktop Manager Ubuntu & Xubuntu
Type or copy and paste this hit enter: sudo xdg-mime query default inode/directory
It should look like this: nemo.desktop
Then open "dconf-editor":
Ubuntu search extensions to find dconf-editors.
Xubuntu it's on your menu under System.
Then set the icons you want Nemo to handle. Computer, Home, Network, Show Desktop Icons, Trash, Volumes-Visible...
Now add Nemo Desktop Manager to your start-up:
Ubuntu:
Open Start Application Preferences
Then click Add on the top right.
Name: Nemo Desktop Manager (Really anything you want)
Command: nemo-desktop
Comment: https://happyasis.com/forums/67 (Or again anything you want the link is to the Ubuntu forum)
Xubuntu:
Open "Sessions and Startup on your menu.
Then click the "ApplicationAutostart" in the bottom left corner click "Add".
Name: what ever you like
Description: Nemo Desktop Manager
Command: nemo-desktop
Trigger: Login
Install Shutter in Ubuntu 20.04, Xubuntu 20.04 and Mint 20
sudo add-apt-repository ppa:linuxuprising/shutter
sudo apt-get update
sudo apt install shutter
sudo apt install gnome-web-photo
Fix printer not showing
Type or copy and paste this hit enter: sudo apt-get install cups
Type or copy and paste this hit enter: sudo /etc/init.d/cups restart
Shit lexmark
sudo chmod g-w /usr/local/lexmark/v3/etc/lxPro700.ppd
Fix No Operating system detected on dual boot installs:
Type or copy and paste this hit enter: sudo apt-get install gdisk
Type or copy and paste this hit enter: sudo fixparts /dev/sda
Type or copy and paste this hit enter: sudo fixparts /dev/sda "w"
Fix screen resolution
Type or copy and paste this hit enter: xrandr (to see what the screen can do)
cvt 1600 900 (Res to try)
Modeline "1440x900_60.00" 106.50 1440 1528 1672 1904 900 903 909 934 -hsync +vsync (copy Modeline)
Type or copy and paste this hit enter: sudo xrandr --newmode "1440x900_60.00" 106.50 1440 1528 1672 1904 900 903 909 934 -hsync +vsync
(17.10 or higher run this first xhost si:localuser:root)
1440x900_60.00 (0xac) 106.500MHz -HSync +VSync
h: width 1440 start 1528 end 1672 total 1904 skew 0 clock 55.93KHz
v: height 900 start 903 end 909 total 934 clock 59.89Hz
password
Now add the new created mode for your display device:
Add to profile
Type or copy and paste this hit enter: gedit ~/.profile
xrandr --newmode "1440x900_60.00" 106.50 1440 1528 1672 1904 900 903 909 934 -hsync +vsync
xrandr --addmode VGA1 "1600x900_60.00"
Run to fixed failed installs
Type or copy and paste this hit enter: sudo apt-get install -f
Fix the internet/network not working (says you're connected but nothing is working online)
Type or copy and paste this hit enter: sudo /etc/init.d/dnsmasq restart
Type or copy and paste this hit enter: sudo /etc/init.d/nscd restart
Type or copy and paste this hit enter: sudo /etc/init.d/networking force-reload
Type or copy and paste this hit enter: sudo /etc/init.d/dns-clean restart
Type or copy and paste this hit enter: ps ax | grep dnsmasq
This command "Type or copy and paste this hit enter: sudo /etc/init.d/dnsmasq restart" should have fixed it if not try the options listed below.
Type or copy and paste this hit enter: sudo apt remove dnsmasq-base
Type or copy and paste this hit enter: sudo apt install dnsmasq
Edit the dnsmasq config file
Type or copy and paste this hit enter: sudo vim /etc/dnsmasq.conf
Add the below mentioned lines
interface=lo
bind-interfaces
listen-address=127.0.0.1
Check if the network manager has dnsmasq line, if yes, then remove it
Restart NetworkManager
Type or copy and paste this hit enter: sudo /etc/init.d/network-manager restart
Retsart dnsmasq
Type or copy and paste this hit enter: sudo /etc/init.d/dnsmasq restart
Fix error "Unknown error: /usr/lib/x86_64-linux-gnu/libgtk3-nocsd.so.0" (also fixes no network)
Type or copy and paste this hit enter: sudo apt install gtk3-nocsd
Type or copy and paste this hit enter: sudo apt install libgtk3-nocsd0:i386
Check for the existence of the dynamic library path environment variable (LD_LIBRARY_PATH)
Type or copy and paste this hit enter: echo $LD_LIBRARY_PATH
If there is nothing to be displayed, add a default path value.
Type or copy and paste this hit enter: LD_LIBRARY_PATH=/usr/local/lib
Type or copy and paste this hit enter: export LD_PRELOAD=/usr/lib/x86_64-linux-gnu/libgtk3-nocsd.so.0
Check if you have the file:
Type or copy and paste this hit enter: ls -l /usr/lib/x86_64-linux-gnu/ |grep libgtk3
Type or copy and paste this hit enter: sudo find / -name libgtk3-nocsd.so
Fix the Mouse speed in Ubuntu, Xubuntu 18.04, 20.04 and Mint 19.3
Type or copy and paste this hit enter: xinput list
Once you know the ID "9", "11", "12" which ever number it shows you on your system.
Type or copy and paste this hit enter: xinput list-props 11 (DEVICE ID NUMBER)
Then look for a line like this:
libinput Accel Speed (299): -0.960000 (The numbers 299 and -0.960000 may be different on each mouse)
Then try setting different speeds until you find one that works for you.
REMEMBER EACH TIME YOU ADD OR REMOVE A USB DEVICE THE "299" NUMBER WILL CHANGE.
Type or copy and paste this hit enter: xinput set-prop 11 299 -0.5
Type or copy and paste this hit enter: xinput set-prop 12 299 -0.6
Type or copy and paste this hit enter: xinput set-prop 12 299 -0.7
Type or copy and paste this hit enter: xinput set-prop 12 299 -0.8
Type or copy and paste this hit enter: xinput set-prop 12 299 -0.9
You need to change the 12 with your mouse ID, and the 299 with your "Accel Speed" property number.
I found -0.5 to -0.7 to work best for me, but you might want to set it to something different.
To make this change permanent after reboot, you will need to run that command automatically at startup.
Ubuntu, Xubuntu and Mint you can do this in "Settings -> Session and Startup -> Application Autostart -> "Add"
Then fill in the full xinput command "xinput set-prop 11 298 -1.0" as command, give it a name and description.
Mouse Fix Ubuntu, Xubuntu 16.04
xinput --list --short
xinput --set-prop "MOUSE NAME" "Device Accel Constant Deceleration" 5
To see the current settings for the device:
xinput --list-props "MOUSE NAME"
Turn Off acceleration
xinput --set-prop "MOUSE NAME" "Device Accel Velocity Scaling" 1
xinput --set-prop "MOUSE NAME" "Device Accel Profile" -1
Hard Disk check
Type or copy and paste this hit enter: sudo tune2fs -c 0 -i 0 /dev/sda3
Type or copy and paste this hit enter: sudo tune2fs -i 10d /dev/sda3 (days)
Optimize SSD in Linux PLEASE REMEMBER when doing anything with a hard drive containing data - BACK-UP, BACK-UP, BACK-UP, BACK-UP, FIRST!
List all hard drives drives
Type or copy and paste this hit enter: sudo fdisk -l
Check if the SSD has Trim
Type or copy and paste this hit enter: sudo hdparm -I /dev/sda | grep "TRIM supported"
Install and turn on FS-TRIM
Type or copy and paste this hit enter: sudo apt install util-linux
Run weekly
Type or copy and paste this hit enter: sudo fstrim -v /
Enable FS-Trim
Type or copy and paste this hit enter: sudo systemctl enable fstrim.service
Type or copy and paste this hit enter: sudo systemctl enable fstrim.timer
Start FS-Trim
Type or copy and paste this hit enter: sudo systemctl start fstrim.service
Type or copy and paste this hit enter: sudo systemctl start fstrim.timer
Benchmark Linux
Go to this webpage https://bench.sh/
Open Terminal
Type or copy and paste this hit enter: Vwget -qO- bench.sh | bash
Fix source list
Type or copy and paste this hit enter: sudo nano /etc/apt/sources.list
Type or copy and paste this hit enter: sudo software-properties-gtk
Pick your options
Fix i386 error's
Type or copy and paste this hit enter: sudo dpkg --add-architecture i386
Type or copy and paste this hit enter: sudo apt update
Type or copy and paste this hit enter: sudo apt install libc6:i386
Install Linux and Windows Games:
Lutris - Xubuntu - Ubuntu - Mint https://lutris.net/downloads/
Type or copy and paste this hit enter: sudo add-apt-repository ppa:lutris-team/lutris
Type or copy and paste this hit enter: sudo apt-get update
Type or copy and paste this hit enter: sudo apt-get install lutris
If you need Vulkan support:
Ubuntu / Linux Mint / Other Ubuntu-based distributions:
Nvidia:
To get the latest Nvidia drivers it is necessary to add the Proprietary GPU Drivers PPA:
Type or copy and paste this hit enter: sudo add-apt-repository ppa:graphics-drivers/ppa
Enable 32 bit architecture (if you haven't already):
Type or copy and paste this hit enter: sudo dpkg --add-architecture i386
Type or copy and paste this hit enter: sudo apt update
440 or the newest drivers.
Type or copy and paste this hit enter: sudo apt install nvidia-driver-440 libnvidia-gl-440 libnvidia-gl-445:i386
Install support for Vulkan API (if you have already added the latest drivers you only need this)
Type or copy and paste this hit enter: sudo apt install libvulkan1 libvulkan1:i386
Just for battle.net
Type or copy and paste this hit enter: sudo apt-get install libgnutls30:i386
Type or copy and paste this hit enter: sudo apt-get install libldap-2.4-2:i386
Type or copy and paste this hit enter: sudo apt-get install libgpg-error0:i386
Type or copy and paste this hit enter: sudo apt-get install libsqlite3-0:i386
To install a game use the search box. Type in the name "battle.net" click the "Search Lutris.net" button.
then just click the app and install. If you are using another drive or partition as I do make sure to set that as the default
game install location in Lutris then just check each install. If you're installing Windows games they will create a "wine"
folder under the Lutris folder you set. In my case File System/Media/Steam/Lutris/Games/battlenet (Steam is the name of my game partition ext4)
Install Epic Games for Windows (Runs in wine must be a new install for each game. Not worth the time in my opinon just use Steam)
https://lutris.net/games/epic-games-store/
Install Steam on Ubuntu, Xubuntu 16.04, 18.04, 20.04 and Mint 19.3
Type or copy and paste this hit enter: sudo apt purge steam (Only if you upgraded from 16.04 to 18.04)
Type or copy and paste this hit enter: sudo rm ~/.steam if that doesn't work go to home/username/.steam (Only if you upgraded from 16.04 to 18.04 - delete .steam folder)
Type or copy and paste this hit enter: sudo add-apt-repository multiverse
Type or copy and paste this hit enter: sudo apt-get install steam
After install type steam into the terminal window to start it the first time it will update and restart once or twice.
Then log into steam all is good.
Now Steam should be on the game menu.
Make Borderlands 3 connect in Linux Steam
WINEPREFIX="/media/Steam/steamapps/compatdata/397540/pfx" ./install-mf-64.sh
WINEPREFIX="/media/Steam/steamapps/compatdata/397540/pfx ./mf-install.sh
WINEPREFIX="/media/Steam/steamapps/compatdata/397540/pfx./install-mf-64.sh
1. Delete /path/to/SteamLibrary/steamapps/compatdata/397540/
2. WINEPREFIX="/media/Steam/steamapps/compatdata/397540/pfx" WINEARCH=win64 wine wineboot
3. WINEPREFIX="/media/Steam/steamapps/compatdata/397540/pfx" ./mf-install.sh
4. WINEPREFIX="/media/Steam/steamapps/compatdata/397540/pfx" ./install-mf-64.sh
Install Teamspeak 3 first you need to download it. https://www.teamspeak.com/en/downloads/
Type or copy and paste this hit enter: cd Downloads (if you saved the download to your Downloads folder)
Type or copy and paste this hit enter: chmod u+x ./TeamSpeak3-Client-linux_amd64-3.5.3.run (change "3.5.3" to the version you downloaded)
Type or copy and paste this hit enter: ./TeamSpeak3-Client-linux_amd64-3.5.3.run (change "3.5.3" to the version you downloaded)
You should see this:
Welcome to the TeamSpeak 3 Client for Linux on amd64 installer
In order to install this software you are required to accept the license
agreement, please press return to view the license. THEN q to exit the license agreement.
Then type "y" and hit enter to accept the license agreement. (like you have a choice on any of these!)
Type or copy and paste this hit enter: cd TeamSpeak3-Client-linux_amd64
To launch TeamSpeak 3 the first time just to set it up.
Type or copy and paste this hit enter: sh ts3client_runscript.sh
Another license agreement - scroll down "I accept"
Create a MyTeamSpeak Account if you like. I do not I just exit the window and setup my server.
Then if you want to move the teamspeak folder you will need to change the owner and permissions.
"chown" will change just the folder permissions "-R" will change all the files in the folder permissions.
Type or copy and paste this hit enter: sudo chown -R your username:your username ~/Downloads/TeamSpeak3-Client-linux_amd64
Then move the TeamSpeak folder where ever you want to keep it.
I moved it to /home/my user/
Creat short cut on the desktop or your panel.
Name: TeamSpeak 3
Command: /home/your username/TeamSpeak3-Client-linux_amd64/ts3client_runscript.sh
Working Directory: /home/your username/TeamSpeak3-Client-linux_amd64
Select an icon: I downloaded the TS3 icon from teamspeak.
Docks
Install or fix Cairo Dock on upgrade to Ubuntu 18.04, 20.04
Type or copy and paste this hit enter: sudo apt update
Type or copy and paste this hit enter: sudo apt install cairo-dock
Type or copy and paste this hit enter: sudo apt install cairo-dock cairo-dock-plug-ins
Add Key: (ONLY IF NEEDED)
Type or copy and paste this hit enter: wget -q http://download.tuxfamily.org/glxdock/repository/cairo-dock.gpg -O- | sudo apt-key add -
Edit your source list
Type or copy and paste this hit enter: sudo nano /etc/apt/sources.list
deb http://download.tuxfamily.org/glxdock/repository/ubuntu (YOUR VERSION - "bionic") cairo-dock
If you had it installed in 14.04 or 16.04 you will need to do this:
Type or copy and paste this hit enter: sudo apt-get remove cairo-dock* --purge
Type or copy and paste this hit enter: sudo apt update
Type or copy and paste this hit enter: sudo apt install cairo-dock
Type or copy and paste this hit enter: sudo apt install cairo-dock cairo-dock-plug-ins
To get Cairo to auto-start with system boot.
On the menu go to Settings - Session and Startup - Application Autostart - Add (bottom left)
Name: Cairo Dock
Command: cairo-dock -o (with open-gl)
Plank a very simple dock if you're having problems with cairo. Ubunutu, Xubuntu, Mint.
start at "2" if you are installing in Xubuntu or Ubuntu, start at "1" if you're installing in Mint.
1. Type or copy and paste this hit enter: sudo add-apt-repository ppa:ricotz/docky
2. Type or copy and paste this hit enter: sudo apt update
3. Type or copy and paste this hit enter: sudo apt install plank
4. Type or copy and paste this hit enter: sudo apt update
To open the configuration setting click the "Plank Icon"
If you do not see a "plank Icon" do this to open the configuration settings.
Type or copy and paste this hit enter: plank --preferences
Run .run
chmod +x yourfilename.run
./yourfilename.run (press enter)
Install Browsers:
If you don't want it asling for a password each time the browser starts:
First if it asks for a "Default Key Ring" LEAVE BOTH FIELDS BLANK and hit enter.
You will recieve a warning that password you use in that browser will not be encrypted. YOU SHOULD NEVER SAVE PASSWORDS IN YOUR BROWSER ANYWAY!!!
If you have already added a password and want to remove in? (Most of the time this happens with Brave or Chromium in Linux Mint)
Search "Passwords and Keys" from the Menu, then select View, By Keyring.
Default keyring (locked) and deleted it. Next time you open Brave, Chromium, it ask for a new Keyring password leave it blank.
Then make sure to add a password manager to your browser like Roboform DO NOT SAVE PASSWORDS OR LOGIND IN THE BROWSER.
sudo apt update
sudo apt install brave-browser
So far, so good! password
Brave Browser on Ubuntu, Xubuntu 18.04, 20.04, 22.04 and Mint 19.3
sudo apt install curl
sudo curl -fsSLo /usr/share/keyrings/brave-browser-archive-keyring.gpg https://brave-browser-apt-release.s3.brave.com/brave-browser-archive-keyring.gpg
echo "deb [signed-by=/usr/share/keyrings/brave-browser-archive-keyring.gpg] https://brave-browser-apt-release.s3.brave.com/ stable main"|sudo tee /etc/apt/sources.list.d/brave-browser-release.list
sudo apt update
sudo apt install brave-browser
1. Open a terminal window. (Terminator Terminal my favorite and can be added in any of the software centers.)
2. Type or copy and paste this hit enter: sudo apt install apt-transport-https curl
3. Type or copy and paste all of this hit enter: sudo curl -fsSLo /usr/share/keyrings/brave-browser-archive-keyring.gpg https://brave-browser-apt-release.s3.brave.com/brave-browser-archive-keyring.gpg
4. Type or copy and paste all of this hit enter: echo "deb [signed-by=/usr/share/keyrings/brave-browser-archive-keyring.gpg arch=amd64] https://brave-browser-apt-release.s3.brave.com/ stable main"|sudo tee /etc/apt/sources.list.d/brave-browser-release.list
5. Type or copy and paste all of this hit enter: sudo apt install apt-transport-https curl
5. Type or copy and paste this hit enter: sudo apt update (most likely you will get an error)
If you don't get an error go to 6.
Error Message:
E. Malformed entry 1 in list file /etc/apt/sources.list.d/brave-browser-release.list (Component)
E. The list of sources could not be read.
E. Type or copy and paste this hit enter: sudo nano /etc/apt/sources.list.d/brave-browser-release.list (Edit the line to look like this https://brave-browser-apt-release.s3.brave.com/ $bionic main
"$xenial main for 16.04 - $bionic main"
E. Type or copy and paste this hit enter: sudo apt update (you can also just use the arrow up key to find the coomand)
6. Type or copy and paste this hit enter: sudo apt install brave-browser
7. Type or copy and paste this hit enter: sudo apt update
If you get an error after running "sudo apt update" can't update after installing Brave.
Type or copy and paste this hit enter: sudo nano /etc/apt/sources.list.d/brave-browser-release-.list
Edit this line: Edit this line: deb [arch=amd64] https://brave-browser-apt-release.s3.brave.com/ main
It should look like this: deb [arch=amd64] https://brave-browser-apt-release.s3.brave.com/ $bionic main
Type or copy and paste this hit enter: sudo nano /etc/apt/sources.list
Add to the bottom
deb [trusted=yes] https://brave-browser-apt-release.s3.brave.com/ bionic main
deb [trusted=yes] https://brave-browser-apt-release.s3.brave.com/ xenial main
Install Brave Browser on Ubuntu - Xubuntu 16.04
1. Open a terminal window.
2. Type or copy and paste all of this hit enter: curl -s https://brave-browser-apt-release.s3.brave.com/brave-core.asc |
sudo apt-get --keyring /etc/apt/trusted.gpg.d/brave-browser-release.gpg add -
3. You should see this - hit enter again: source /etc/os-release
4. Type or copy and paste all of this hit enter: echo "deb [trusted=yes] https://brave-browser-apt-release.s3.brave.com/ $xenial main" | sudo tee /etc/apt/sources.list.d/brave-browser-release-${xenial}.list
5. Type or copy and paste all of this hit enter: sudo nano /etc/apt/sources.list.d/brave-browser-release-.list
Edit this line: deb [arch=amd64] https://brave-browser-apt-release.s3.brave.com/ main
It should look like this: deb [arch=amd64] https://brave-browser-apt-release.s3.brave.com/ $xenial main
6. Type or copy and paste this hit enter: sudo nano /etc/apt/sources.list
7. Add this to the bottom of the page - make it the last line, arrow key down.
Copy and paste this into the file: deb [trusted=yes] https://brave-browser-apt-release.s3.brave.com/ xenial main
8. Ctrl + X to exit, Y for YES, enter key to save.
9. Type or copy and paste this hit enter: sudo apt update
10. Type or copy and paste this hit enter: sudo apt install brave-keyring brave-browser
11. Setup your new browser it should always update for here forward.
Is it worth all the trouble to use this browser? Yes & No Chromium is faster (the good version of Chromium).
https://happyasis.com/forums/topic/814/internet-browser-updates/view/post_id/4578
But if you watch Netflix, Netflix will not play in Chromium. Amazon Prime plays no problem but no go on NetFlix.
Netflix will suggest the MALWARE browser google-chrome which is Chromium based.
But google add's tons of tracking, bloatware, data-mining to google chrome so it's VERY SLOW!
Brave in Mint 19.3
sudo apt install apt-transport-https curl
sudo curl -fsSLo /usr/share/keyrings/brave-browser-archive-keyring.gpg https://brave-browser-apt-release.s3.brave.com/brave-browser-archive-keyring.gpg
echo "deb [signed-by=/usr/share/keyrings/brave-browser-archive-keyring.gpg arch=amd64] https://brave-browser-apt-release.s3.brave.com/ stable main"|sudo tee /etc/apt/sources.list.d/brave-browser-release.list
sudo apt update
sudo apt install brave-browser
Brave and Firefox are both Chromium based but both play Netflix, Amazon, Hulu in Linux.
Brave normally having the better picture.
The best browsers in Linux.
1. Chromium the fastest browser - Amazon Prime.
2. Slimjet very fast also, glitches twitter gifs. - Amazon Prime, the fastest browser made for downloaing anything.
(Download 4 gigs TEN TIMES faster then any other browser.) Install mp4 player sudo cp libffmpeg.so /opt/slimjet/
3. Brave glitches a few sites. - Plays Netflix, Amazon Prime, Hulu by far the best picture and work 98% of the time.
(SAFEST BROWSER MADE you can block 99.9% of all the tracking and data-mining.)
4. Firefox the slowest one in Linux. - Plays Netflix, Amazon Prime, Hulu with a pretty good picture and works 100% of the time.
Install Chromium in Ubuntu, Xubuntu 16.04, 18.04, 20.04 and Mint 19.3.
Type or copy and paste this hit enter: sudo add-apt-repository ppa:canonical-chromium-builds/stage
Type or copy and paste this hit enter: sudo apt-get update
Type or copy and paste this hit enter: sudo apt-get install chromium-browser
To add language packages:
Type or copy and paste this hit enter: sudo apt install chromium-browser-l10n
To add only the patent-free (ogg, vorbis, theora and av1) codecs:
Type or copy and paste this hit enter: sudo apt install chromium-codecs-ffmpeg
To add the patent-free codecs + mp3, aac, ac3, mpeg4 (audio/h264), mov:
Type or copy and paste this hit enter: sudo apt install chromium-codecs-ffmpeg-extra
To remove Chromium in Ubuntu, Xubuntu 16.04, 18.04, 20.04 and Mint 19.3.
sudo add-apt-repository --remove ppa:canonical-chromium-builds/stage
sudo apt update
sudo apt upgrade
Install VLC Plugin
Type or copy and paste this hit enter: sudo apt-get update
Type or copy and paste this hit enter: sudo apt-get install vlc browser-plugin-vlc
18.04 Software Center is gone unless you upgraded from 16.04 then you still have it.
To add the Gnome Software Center.
Type or copy and paste this hit enter: sudo apt update
Type or copy and paste this hit enter: sudo apt install gnome-software
Type or copy and paste this hit enter:
To add the Synaptic Package Manager
Type or copy and paste this hit enter: sudo apt update
Type or copy and paste this hit enter: sudo apt install synaptic
Type or copy and paste this hit enter: sudo apt update
Install VLC:
Type or copy and paste this hit enter: sudo apt-get install vlc
Type or copy and paste this hit enter: sudo apt-get update
To uninstall VLC
Type or copy and paste this hit enter: sudo apt-get remove vlc
Type or copy and paste this hit enter: sudo apt-get update
Installing libdvdcss
Legal warning: Check with your local laws to make sure usage of libdvdcss2 would be legal in your area.
Ubuntu 15.10 and newer
From Ubuntu 15.10 onwards, libdvd-pkg is available to ease the installation of libdvdcss.
Install the libdvd-pkg package (no need to add third party repositories) via Synaptic or command line:
Type or copy and paste this hit enter: sudo apt install libdvd-pkg
Type or copy and paste this hit enter: sudo dpkg-reconfigure libdvd-pkg
Follow libdvd-pkg's instructions to let it download, compile, and install libdvdcss.
Install DWS (Remote Desktop like TeamViewer but 100% free) on Linux
You will need to setup an account https://www.dwservice.net
Then just add an agent (computer) if you have lots of computers seperate them by groups.
Now Download DWS https://www.dwservice.net/en/download.html
Open a terminal window change the directory to the location of the file. (most likely Downloads)
1. Type or copy and paste this hit enter: cd Downloads
2. Type or copy and paste this hit enter: sudo bash dwagent.sh
Follow the instructions add the installation code given to you to your online login at dwservice.
That easy you are all done.
Not as full featured as TeamViewer but it always works and you can use the FREEE software to fix the broken PAID software.
Screen recorders:
Open Broadcaster Software (OBS) record or live stream in my opinion the best one made.
Type or copy and paste this hit enter: sudo add-apt-repository ppa:obsproject/obs-studio
Type or copy and paste this hit enter: sudo apt update
Type or copy and paste this hit enter: sudo apt install obs-studio
ScreenStudio
Type or copy and paste this hit enter: sudo add-apt-repository ppa:soylent-tv/screenstudio
Type or copy and paste this hit enter: sudo apt update
Type or copy and paste this hit enter: sudo apt install screenstudio
Record my Desktop
Type or copy and paste this hit enter: sudo apt-get install gtk-recordmydesktop
Kazam no web cam
Type or copy and paste this hit enter: sudo apt-get install kazam
New Version With Broadcast
Type or copy and paste this hit enter: sudo apt-add-repository ppa:sylvain-pineau/kazam
Type or copy and paste this hit enter: sudo apt update
Type or copy and paste this hit enter: sudo apt install kazam
Type or copy and paste this hit enter: sudo apt upgrade
How to Remove Kazam
Type or copy and paste this hit enter: sudo add-apt-repository --remove ppa:sylvain-pineau/kazam
Type or copy and paste this hit enter: sudo apt update
Type or copy and paste this hit enter: sudo apt upgrade
You can perform all task in above-mentioned steps from a command line as well using Shortcut Keys.
Use these keys to Start the Recording
WINDOWS-KEY-CTRL-R
Use these keys to Finish the recording
WINDOWS-KEY-CTRL-F
Use these keys to Pause the recording
WINDOWS-KEY-CTRL-P
Use these Keys to Quit the recording
WINDOWS-KEY-CTRL-Q
Vokoscreen
Type or copy and paste this hit enter: sudo apt-get install vokoscreen
Simple Screen Recorder
1. Type or copy and paste this hit enter: sudo add-apt-repository ppa:maarten-baert/simplescreenrecorder
2. Type or copy and paste this hit enter: sudo apt-get update
3. Type or copy and paste this hit enter: sudo apt-get install simplescreenrecorder
Create animated gifs.
Gifine is screencasting tool for Linux which is used for recording and stitching
together small animated gifs or videos. It supports both GIF and MP4 video output.
Type or copy and paste this hit enter: git clone --depth 1 https://github.com/lolilolicon/xrectsel.git
Type or copy and paste this hit enter: cd xrectsel
Type or copy and paste this hit enter: ./bootstrap && ./configure
Type or copy and paste this hit enter: sudo make install
Type or copy and paste this hit enter: sudo apt install gifsicle luarocks libgirepository1.0-dev
Type or copy and paste this hit enter: sudo luarocks install --server=http://luarocks.org/dev gifine
For running gifine, type the following command:
Type or copy and paste this hit enter: gifine
Peek
Type or copy and paste this hit enter: sudo add-apt-repository ppa:peek-developers/stable
Type or copy and paste this hit enter: sudo apt update
Type or copy and paste this hit enter: sudo apt install peek
Handbrake beyond version 1.XX in Ubunutu 16.0.4+
1. If you have already installed handbrake from Ubuntu’s softwarecenter/main repository.
Remove it either via Ubuntu Software Center or using the command: (command is better)
Type or copy and paste this hit enter: sudo apt remove handbrake && sudo apt autoremove
Type or copy and paste this hit enter: sudo apt-get update
2. Add the PPA, Type or copy and paste this hit enter: sudo add-apt-repository ppa:stebbins/handbrake-releases
3. Install the 1.0.0+ release via commands:
Type or copy and paste this hit enter: sudo apt update
Type or copy and paste this hit enter: sudo apt install handbrake-gtk handbrake-cli
Now you should find it under on your menu provided your using a distro with a menu. Multimedia = Media Transcoder
If you're still using the annoying unity search the pictures thing trying searching Handbrake or Media Transcoder
Remove PPA's
Type or copy and paste this hit enter: sudo apt-get install ppa-purge
Remove packages from PPA
Type or copy and paste this hit enter: sudo ppa-purge ppa:whatever/ppa
Remove all
Type or copy and paste this hit enter: sudo apt-get purge package_name
Kill Commands
On the menu System Setting/System Monitor (Unity no menu search for System Monitor)
Find the program you want killed, right click stop or kill
In a terminal window
Type or copy and paste this hit enter: killall (PROGRAM NAME)
Find the PID (program ID)
Type or copy and paste this hit enter: ps aux | grep "$appName" | grep -v 'grep'
Type or copy and paste this hit enter: kill 1234 (teamviewer ID)
If after running the kill command the application still doesn't die you can force it by using the -9 switch as follows:
Type or copy and paste this hit enter: kill -9 1234
Install VeraCrypt in Linux
Download the newest version for your version of Linux. https://www.veracrypt.fr/en/Downloads.html
Extract the archive to a folder I used this Downloads\VeraCrypt
Open a terminal window.
Type or copy and paste this hit enter: cd ~ /Downloads/VeraCrypt/ (hit enter) or what ever folder you saved it to.
Type or copy and paste this hit enter: sudo bash veracrypt-1.23-setup-gui-x64 (should be the file name - hit enter)
Follow the instructions all done. (search or look on your menu under Accessories)
Auto Mount NTFS - This will most likely give ownership to ROOT. I don't auto-mount any NTFS drives as they will auto-mount in READ ONLY.
Type or copy and paste this hit enter: sudo apt-get install ntfs-config
Type or copy and paste this hit enter: sudo ntfs-config
More help - but just open the NTFS drives much less problems.
http://csetutorials.com/auto-mount-ntfs-partitions-startup-ubuntu-linux.html
Installing and using Samba Share. You will be able to read & write from any Linux or Windows computer.
Run these commands first:
Type or copy and paste this hit enter: sudo apt install gksu (18.04 and higher use admin:/// or pkexec)
Type or copy and paste this hit enter: sudo apt-get install samba
Type or copy and paste this hit enter: sudo touch /etc/libuser.conf
Type or copy and paste this hit enter: sudo apt-get --reinstall install samba-libs
Verify Samba is running:
Type or copy and paste this hit enter: sudo systemctl status smbd
If you have problems do this:
Type or copy and paste this hit enter: apt-get install -f (if anything fails)
Then install Samba from the software Center / Software Manager.
Type or copy and paste this hit enter: sudo apt-get System-config-samba
Type or copy and paste this hit enter: sudo cp /etc/samba/smb.conf ~
Type or copy and paste this hit enter: gksu admin:// system-config-samba (gksu has been removed in newer versions of Xubuntu, Ubuntu, Mint)
On newer versions if Samba won't start find Samba on your menu or search for it and edit the start command.
Command: sudo pkexec system-config-samba
Options: Check both "Use Startup notification and Run in terminal" That should open a terminal window, type in your password and samba should open.
Type or copy and paste this hit enter: sudo nano /etc/samba/smb.conf
[shared folder name]
path = /media/YOUR USER NAME/FOLDER YOU ARE SHARING
browseable = yes
available = yes
writeable = yes
valid users = beast
guest ok = no
Type or copy and paste this hit enter: sudo system-config-samba
If you get a copy error "xxxxxxx"
Type or copy and paste this hit enter: sudo touch "error"
Type or copy and paste this hit enter: sudo system-config-samba
Select Execute in termainl emulator
Type or copy and paste this hit enter: apt-get update
Type or copy and paste this hit enter: apt-get install -f
Webadmin
Login as main user - main user password
https://localhost:10000/
Start Samba
Type or copy and paste this hit enter: sudo service smbd start
Stop Samba
Type or copy and paste this hit enter: sudo service smbd stop
Restart Samba
Type or copy and paste this hit enter: sudo service smbd restart - sudo systemctl restart smbd
Restart sharing network
Type or copy and paste this hit enter: sudo /etc/init.d/smbd restart
Use this command to check your smb.conf file for syntax errors:
Type or copy and paste this hit enter: sudo testparm
Ubuntu 20.04 Samba is broken no GUI you need to manully configure it.
sudo mousepad /etc/samba/smb.conf
Add users
sudo smbpasswd -a user
usermod -c "Comment" beast
usermod -l beast Comment
Samba Conf
[global]
netbios name = AMD-FX8320
security = user
workgroup = workgroup
server string = %h server
log file = /var/log/samba/samba.log
max log size = 1000
dns proxy = No
hosts allow = 127. 192.168.1.
hosts deny = false
cups options = raw
printing = cups
printcap name = cups
[printers]
comment = All Printers
path = /var/spool/samba
browseable = yes
writable = no
guest ok = no
public = no
printable = yes
locking = no
strict locking = no
[print$]
path = /var/lib/samba/printers
#[Public Directory]
#path = /Public/Files
#guest ok = yes
#read only = no
#browseable = yes
[Private Directory]
path = /private/files/
valid users = beast
read only = yes
browseable = no
[movies-1]
path = /media/beast/movies-1/movies-1
comment = movies-1
read only = no
available = yes
browseable = yes
writable = yes
guest ok = no
public = no
printable = no
locking = no
strict locking = no
valid users= beast
[movies-2]
path = /media/beast/movies-2/movies-2
comment = movies-2
read only = no
available = yes
browseable = yes
writable = yes
guest ok = no
public = no
printable = no
locking = no
strict locking = no
valid users = beast
[movies-3]
path = /media/beast/movies-3/movies-3
comment = movies-3
read only = no
available = yes
browseable = yes
writable = yes
guest ok = no
public = no
printable = no
locking = no
strict locking = no
valid users = beast
[TV-1]
path = /media/beast/movies-3/TV-1
comment = TV-1
read only = no
available = yes
browseable = yes
writable = yes
guest ok = no
public = no
printable = no
locking = no
strict locking = no
valid users = beast
[TV-2]
path = /media/beast/movies-4/TV-2
comment = TV-2
read only = no
available = yes
browseable = yes
writable = yes
guest ok = no
public = no
printable = no
locking = no
strict locking = no
valid users = beast
[TV-3]
path = /media/beast/movies-4/TV-3
comment = TV-3
read only = no
available = yes
browseable = yes
writable = yes
guest ok = no
public = no
printable = no
locking = no
strict locking = no
valid users = beast
[Software-HD-Image]
path = /media/beast/3-TB-SG
comment = Software-HD-Image
read only = no
available = yes
browseable = yes
writable = yes
guest ok = no
public = no
printable = no
locking = no
strict locking = no
valid users = beast
My Computer
[software]
path = /media/beast/software
comment = Software
valid users = beast
read only = no
available = yes
browseable = yes
writable = yes
guest ok = no
public = no
printable = no
locking = no
strict locking = no
valid users = beast
Fix Windows computers not connecting
If you saved a password for a network drive in windows and want to remove it, press the keys [Windows] + [R] to open the windows command line.
Then enter control keymgr.dll and click on “OK” to open the windows credential manager which allows you to manage and delete passwords saved in Windows.
Highlight server and click REMOVE FROM VAULT
Reboot computer.
Universal Media Server - sharing videos or music.
https://www.universalmediaserver.com/
Download the version for your Linux.
Then either go to the folder and extract the zip (.tar) right click extract.
Or open a terminal window:
If you don't have these install them
1. Type or copy and paste this hit enter: sudo apt-get install mediainfo dcraw vlc-nox mplayer mencoder (enter your password - hit enter again)
2. Type or copy and paste this hit enter: sudo apt-get install mediainfo libzen-dev libmediainfo-dev
3. Type or copy and paste this hit enter: sudo apt-get install software-properties-common
4. Type or copy and paste this hit enter: sudo apt-get install dcraw
4. Type or copy and paste this hit enter: sudo apt-get update
(YOU WILL NEED TO INSTALL JAVA ON YOUR SYSTEM IF YOU DON'T HAVE IT)
Add the PPA (skip this if you already have java installed)
1. Type or copy and paste this hit enter: cd (if your terminal window is still in the Downloads/ums-7.9.0 folder)
2. Type or copy and paste this hit enter: sudo apt-get update
3. Type or copy and paste this hit enter: sudo apt-get install update-sun-jre (this should always install the newest version)
Or what I used:
1. Type or copy and paste this hit enter: sudo add-apt-repository ppa:webupd8team/java (the number will change as the versions of java change)
2. Type or copy and paste this hit enter: sudo apt-get update
3. Type or copy and paste this hit enter: sudo apt update
4. Type or copy and paste this hit enter: sudo apt install oracle-java8-installer
(type Y when it asks, hit enter when you see "OK" on the installer window, arrow key to the left select "Yes" hit enter)
Install default Java on Xubuntu, Ubuntu, 16.04, 18.04, 20.04 and Mint 19.3
Type or copy and paste this hit enter: sudo apt install default-jre
Type or copy and paste this hit enter: sudo apt install openjdk-11-jre-headless
Type or copy and paste this hit enter: sudo apt install openjdk-8-jre-headless (change the number "8" to the newest version)
Now to install.
Using the opt directory for install
1. Type or copy and paste this hit enter: cd Downloads (if you downloaded the file to your downloads folder)
2. Type or copy and paste this hit enter: sudo tar -xvzf UMS-9.0.0.tgz (the name of the file you're using)
3. Type or copy and paste this hit enter: sudo mv ums-7.9.0 /opt/ums
4. Type or copy and paste this hit enter: sudo /Downloads tar -xvzf UMS-9.0.0.tgz
5. Type or copy and paste this hit enter: sudo ln -s /opt/ums-7.9.0 ums
6. Type or copy and paste this hit enter: sudo rm UMS-7.9.0.tgz
7. Type or copy and paste this hit enter: sudo nano /etc/init.d/ums
https://www.universalmediaserver.com/forum/viewtopic.php?f=10&t=1519
https://www.slsmk.com/how-to-install-universal-media-server-ums-on-ubuntu-in-headless-mode/
Make a script to make it run
1. Type or copy and paste this hit enter: nano /etc/init.d/UMS.sh
2. Type or copy and paste this hit enter: update-rc.d UMS.sh defaults
3. Type or copy and paste this hit enter: chmod +x /etc/init.d/UMS.sh
4. Type or copy and paste this hit enter: service UMS.sh start
5. Type or copy and paste this hit enter: cd ums-7.9.0 (should be the name of the unzipped folder)
Now your terminal should look like this yourname@yourname:~Downloads/ums-7.9.0$
To start Universal Media Center the first time
1. Type or copy and paste this hit enter: ./UMS.sh
Then just follow the on screen instructions.
All done tested on Samsung 46 1080p & LG 65 4K worked perfectly.
Transcoding engine VLC is not available because it failed with exit code 1.
Get Ubuntu version should work on any Ubuntu base Distro.
Type or copy and paste this hit enter: sudo lsb_release -a
Install Different Distros in Ubuntu.
Type or copy and paste this hit enter: sudo apt-get install xubuntu-desktop
Type or copy and paste this hit enter: sudo apt-get install lubuntu-desktop
Remove Distros
Type or copy and paste this hit enter: sudo apt-get autoremove --purge $( dpkg-query -l *xubuntu* | grep ii | tr -s " " | cut -d" " -f2; dpkg-query -l *xfce* | grep 'ii' | tr -s " " | cut -d" " -f2 )
Type or copy and paste this hit enter: sudo apt-get install --no-install-recommends xubuntu-desktop
If updates are not working look for errors on download repository and manaully download and upgrade.
Type or copy and paste this hit enter: sudo apt-get update
Type or copy and paste this hit enter: sudo apt-get upgrade
Upgrade all software and distro
Type or copy and paste this hit enter: sudo apt-get dist-upgrade
Type or copy and paste this hit enter: sudo apt-get update && sudo apt-get upgrade
sudo editor /etc/update-manager/meta-release
# replace every "https" with "http"
sudo apt update
sudo do-release-upgrade
Upgrade Mint 19.3 to 20.3
Type or copy and paste this hit enter: sudo apt-get update && sudo apt full-upgrade
Type or copy and paste this hit enter: apt install mintupgrade
Type or copy and paste this hit enter: mintupgrade check
Type or copy and paste this hit enter: mintupgrade download
Type or copy and paste this hit enter: mintupgrade upgrade
Install Software Center Xubuntu, Ubuntu 16.04 or older
Type or copy and paste this hit enter: sudo apt-get remove software-center
Type or copy and paste this hit enter: sudo apt-get install software-center
Update Grub
sudo update-grub
Install Grub Customizer in Ubuntu (all Versions this will allow you to edit the grub boot Works in Ubuntu, Xubuntu, Mint)
Type or copy and paste this hit enter: sudo add-apt-repository ppa:trebelnik-stefina/grub-customizer
Type or copy and paste this hit enter: sudo apt-get update
Type or copy and paste this hit enter: sudo apt-get install grub-customizer
Adding Windows to Grub.
Type or copy and paste this hit enter: sudo apt install efibootmgr
Type or copy and paste this hit enter: sudo efibootmgr
Remove Software
Type or copy and paste this hit enter: sudo apt-get remove mplayer
Type or copy and paste this hit enter: sudo apt-get --purge remove lighttpd
Type or copy and paste this hit enter: sudo apt autoremove
Type or copy and paste this hit enter: dpkg --list
Type or copy and paste this hit enter: dpkg --list | less
Type or copy and paste this hit enter: dpkg --list | grep -i 'http'
Become Root
Type or copy and paste this hit enter: sudo -i
Remove Delete Folders
Type or copy and paste this hit enter: sudo ls -lha /path/
Type or copy and paste this hit enter: sudo rm -r -f /media/beast/games (folder or file)
Type or copy and paste this hit enter: sudo rm -r /media/beast/games
Type or copy and paste this hit enter: rmdir directory_name
Type or copy and paste this hit enter: sudo rm -rf /"Linux Games"
Remove folders with a space in the name
Type or copy and paste this hit enter: sudo rm -r /media/YOUR USERNAME/"test server" (Close the name in "xxx xxx" quotes)
List Files & Dir
Type or copy and paste this hit enter: ls -alt
Install Wine https://wiki.winehq.org/Ubuntu
Type or copy and paste this hit enter: sudo dpkg --add-architecture i386
Type or copy and paste this hit enter: wget -nc https://dl.winehq.org/wine-builds/winehq.key
Type or copy and paste this hit enter: sudo apt-key add winehq.key
Add the repository:
Ubuntu 19.04 Type or copy and paste this hit enter: sudo apt-add-repository 'deb https://dl.winehq.org/wine-builds/ubuntu/ Focal main'
Ubuntu 19.04 Type or copy and paste this hit enter: sudo apt-add-repository 'deb https://dl.winehq.org/wine-builds/ubuntu/ disco main'
Ubuntu 18.10 Type or copy and paste this hit enter: sudo apt-add-repository 'deb https://dl.winehq.org/wine-builds/ubuntu/ cosmic main'
Ubuntu 18.04 Type or copy and paste this hit enter: sudo apt-add-repository 'deb https://dl.winehq.org/wine-builds/ubuntu/ bionic main'
Ubuntu 16.04 Type or copy and paste this hit enter: sudo apt-add-repository 'deb https://dl.winehq.org/wine-builds/ubuntu/ xenial main'
Type or copy and paste this hit enter: sudo apt update
Then install one of the following packages:
(16.04 use the software center)
Stable branch:
Type or copy and paste this hit enter: sudo apt install wine
Type or copy and paste this hit enter: sudo apt install --install-recommends winehq-stable
Development branch:
Type or copy and paste this hit enter: sudo apt install --install-recommends winehq-devel
Staging branch:
Type or copy and paste this hit enter: sudo apt install --install-recommends winehq-staging
Install Ywriter for Windows.
Install wine from the software center.
Download ywriter(version).exe http://www.spacejock.com/yWriter5_Download.html
Open a terminal window and run these: (DO NOT follow the install instructions on the yWrter site they are wrong)
Type or copy and paste this hit enter: cd Downloads (if you downloaded it to downloads)
Type or copy and paste this hit enter: wine yWriter5Full.exe (hit enter)
Followw the on screen install instructions. Look for the yWriter link on your desktop click it and finish the setup.
Libre Office ONLY if it's not already installed.
Type or copy and paste this hit enter: sudo add-apt-repository ppa:libreoffice/libreoffice-5-4
Type or copy and paste this hit enter: sudo add-apt-repository ppa:libreoffice/ppa
Type or copy and paste this hit enter: sudo apt update
Type or copy and paste this hit enter: sudo apt install libreoffice
Install DVDSTyler for burning DVD's
Type or copy and paste this hit enter: sudo add-apt-repository ppa:ubuntuhandbook1/dvdstyler
Type or copy and paste this hit enter: sudo apt update
Type or copy and paste this hit enter: sudo apt install dvdstyler
To uninstall
Type or copy and paste this hit enter: sudo apt remove dvdstyler dvdstyler-data
Remote Desktop Linux to Windows "RDP"
If you don't have the Software Center installed:
Type or copy and paste this hit enter: sudo apt-get install software-center
It will ask for your Linux password, type it in hit Enter.
Type or copy and paste this hit enter: sudo apt-get update
Then open the "Software Center" once in there search for Remmina (it's also in the newer "Software" in Xubuntu, Ubuntu 20.04 and Mint 19.3)
(RDP client for Windows NT/2000 Terminal Server and Windows Servers)
It will be installed under "Internet" on your menu. If you're still using the old unity thing search for Remote Desktop Client click or double click to open it.
Then on to the setup

it's pretty easy.
Or just use a terminal window this way always seems easier to me.
Install Remmina
Type or copy and paste this hit enter: sudo
This post was edited by beastusa at July 22, 2024 7:19 AM PDT